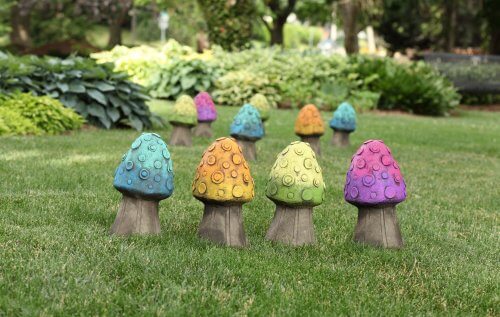
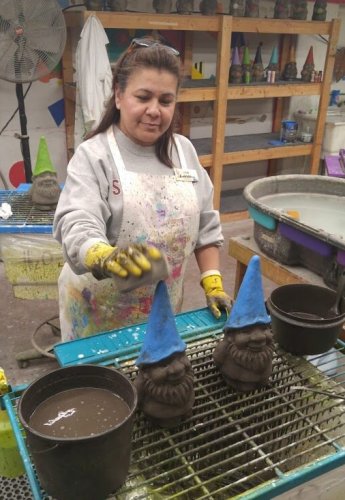
If you have spent any time perusing Isabel Bloom’s website or visiting one of our stores, you’ve probably noticed that we’ve started adding a LOT of different colors to our sculptures. Why? Because we feel that it adds that little bit of fun to some of our designs. Also, with the addition of color we are able to bring in the colors of each season. It has also opened up a whole new spectrum of possibilities for designs that we might not have thought of before, such as our bright and beautiful new Mushroom and our whimsical Gnomes!
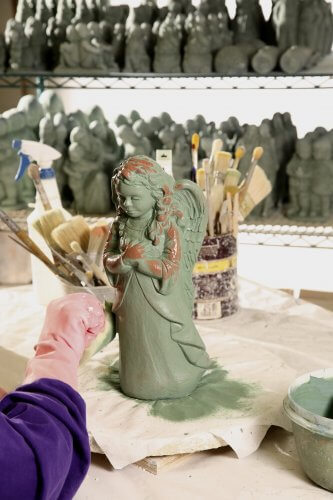
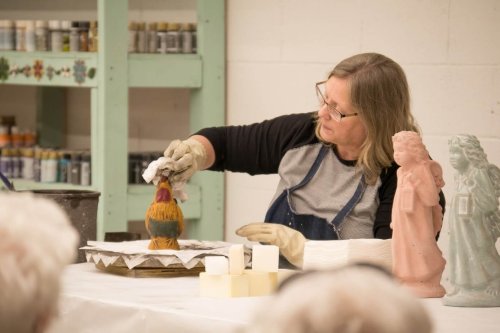
And the people who get to hand-apply these fun colors? Our finishing department! In my opinion, the finishers have the most fun job here at Isabel Bloom. They get to bring life to our sculptures by adding color and definition to each piece. Every one of our talented finishers has a different job; from greening, to whiting, to verdigris, and to applying color.
Finishing 101
We have been adding color to our line of handcrafted sculptures since 2005. Color sometimes would be applied to our existing “green” finish to add a pop of color here and there. As the years have gone by, our finishes have evolved to include Green, Vintage Rose, Weathered Bronze, many different Multi-color finishes, Verdigris and our most recent “Garden” finish.
Weathered Bronze
Isabel’s original finish was actually the Weathered Bronze. This classic finish is composed of the brown cement mixture. It is then “Greened” with a layer of blue/green dyed liquid cement. Some of the green finish is then strategically wiped away to expose the brown undertones of the sculpture, giving each piece that Victorian Era weathered bronze look that Isabel so loved.
Whiting
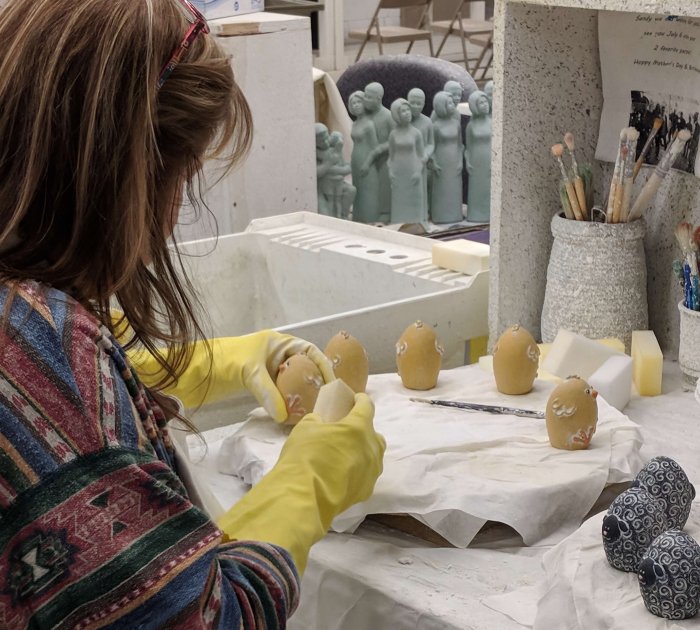
The “whiting” phase is achieved by applying a liquefied white cement to certain sculptures to bring out the details in the piece. As the finishers wipe-away the white cement, they leave some behind in the facial features, lines and folds of any clothing, and any other element of the design that calls for detail.
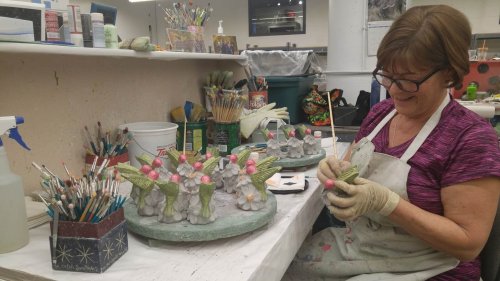
Adding Color
In the finishing process, color is usually added after the sculpture has been cast. Then the additional paint is applied. However, some of our “Multi-color” sculptures are actually not all painted; some are poured in their natural finish and then coated(or not) to seal the deal. For example, each of the birds in our bird series is poured in a color that closely matches their natural color. The Cardinal is poured in red, the blue bird is poured in blue, the goldfinch is poured in yellow…and so on. Then, last touches of paint are added to finish off the coloring that is unique to each bird.
How do we decide which sculptures to cast in color and which to add color to after? It all depends upon the amount of color that needs to be applied. Often we experiment, trying both options, and see which one makes the most sense for that particular sculpture.
A few lucky finishers get to join the fun and experiment with adding color during the design process. As we play with colors and try to decide which ones we like best for the final version of each design, these finishers get to give their input and test colors they like or think you (our customers) will like.
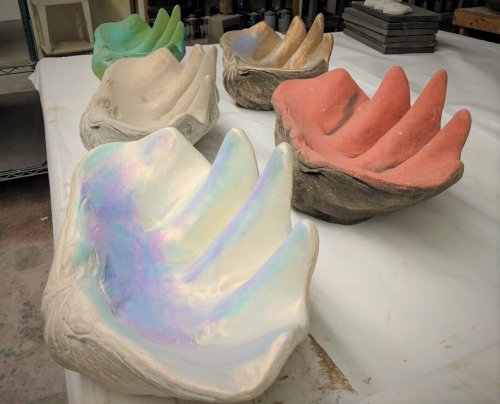
Currently, our product development team is trying to decide which finish or finishes to use for our hopeful future reintroduction; the large shell. Which would you choose?! Share in the comments below!
Garden Finish
Our Garden line finish is quite unique. Most are poured in either a brown or light grey cement, and then “etched” to give them that textured, rough look and feel of a sculpture that has “aged” out in the natural elements. Any coloring is added after they are etched. Our Gnomes are a great example of this.
Meet Kristi!!
We have a total of eleven finishers at Isabel Bloom and they have all been with the company at least 15 years or more! One long time employee, Kristi, has been a finisher with Isabel Bloom for almost 25 years! And she does it all! Aside from her daily tasks of greening or whiting, she is often our tour guide. Chances are if you have taken a tour from us, you have had the pleasure of having her for your guide. Kristi says she enjoys the break from finishing because she likes meeting people and explaining the handcrafted process to them. “Our customers are always so amazed at how much goes into the making of an Isabel Bloom sculpture.”
Over the years Kristi has collected quite a few blooms of her own, but she truly enjoys the ones with the Mississippi River stones in them. Among her faves are the French Hen and Starfish. Both sculptures are retired now, but are still treasured among collectors.
The Next Phase…
The next and last step in the production process is coating. Join me next time as I breeze into the coating department for a day.
Comments
5 Comments
Comments are closed.
beccavan1
I love the white shell with the blue❣️
Nancy
I also love the white one in front that looks iridescent.
Linda
I have to agree the iridescent white pearl is a definite winner.
Christine
Love the pearl look also, looks authentic.
Beth
The iridescent white pearl is stunning!